
How To Use A Rinseless Wash
Paint chip repair is simple when you have the right products. Dr. ColorChip makes excellent paint chip repair kits that render paint chips nearly invisible.
A paint chip is characterized by an absence of paint. A rock or debris has literally chipped the paint away. To fix paint chips, you need to fill them with paint and then blend it flush with the surrounding paint. The blending is the tricky part, but Dr. ColorChip makes it easy with their complete paint chip repair kits.
Autogeek has several kits designed to fill and repair paint chips and road rash. Road rash is a large number of small paint chips. Road rash often occurs on the hood or behind the tires where rocks are kicked up. Choose whichever Dr. ColorChip kit fits your needs and follow these simple instructions:
Dr. ColorChip Paint Chip & Road Rash Repair Instructions:
Before repairing the paint, make sure the vehicle is clean and dry. Use rubbing alcohol to remove any existing touch-up paint.
|
Step 1: Apply the paint with a brush. Then lightly smear the paint with your thumb until the paint is flat and flush across the chip. Reapply the paint as needed until the chip is uniformly filled. If smeared properly, the paint will be dry to the touch within a minute. For road rash, the paint may be applied to a T-shirt rag, then smeared across the panel to quickly address hundreds of tiny chips at once. (A T-shirt is best because it is a very flat, smooth fabric.) STEP 2: Use Dr. ColorChip's blending solution to remove excess paint. Apply the solution to a soft, folded T-shirt rag and lightly rub over the excess paint. The paint will begin blending away after a few passes with the cloth. Use a soft microfiber towel to buff off the residual solution to an amazing shine. This process may be done within 2 minutes to 2 hours after applying the paint. Although the paint is dry to the touch, it will still take about a week to fully cure. However, it may be immediately exposed to water without coming out of the chips. After you've repaired your paint with a Dr. ColorChip Paint Chip Repair System, wax after one week. Avoid machine polishing the repaired area for at least 30 days. When you do need to polish, Dr. ColorChip recommends using a random orbital polisher and foam pads for the best results over the repaired area. |
 |
 |
|
 |
How To use a Rinseless Wash
How dirty is too dirty to safely use a rinseless wash to wash my car?
Great question and while every situation will be a little bit different you can safely wash cars, trucks and SUV's with light dirt accumulation. Vehicles with a heavy dirt accumulation, especially if they are not regularly washed or if there is visible mud caked onto the paint, should have the large accumulation of dirt first removed using a pressure washer or a strong spray of water. If you don't have access to a pressure washer or a free flowing source of water (a garden hose hooked up to a water spigot) then go to a do-it-yourself car wash.
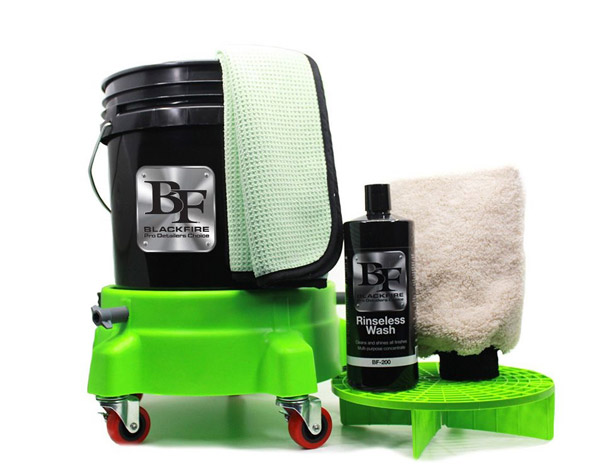
Getting StartedYou need clean, tall bucket such as one of our 5-gallon buckets. The most popular way to use a Rinseless Car Wash by serious enthusiasts is to use the Two Bucket Method. One bucket holds your Rinseless Car Wash Solution and the other bucket is filled with clean water and a Grit Guard Insert to trap any dirt and road grime you remove off the car at the bottom of the bucket. You can also agitate your mitt against the Grit Guard Insert to loosen and remove dirt out of your wash mitt. |
 |
Measuring your rinseless wash concentrate
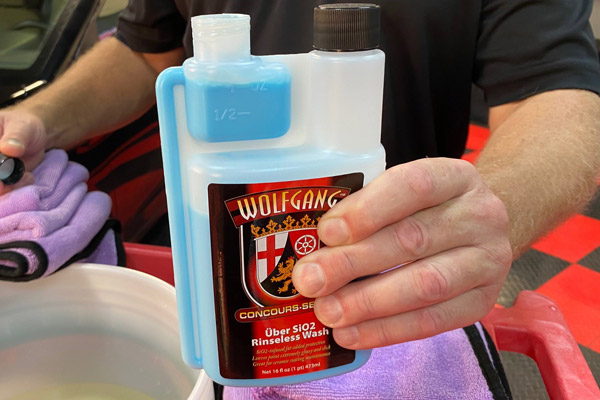
Most rinseless car washes on the market are mixed at 1 ounce per 2 gallons of water:
- BLACKFIRE Rinseless Wash = 1 ounce for 2 gallons of water
- Pinnacle Liquid Gloss Rinseless Wash with Carnauba = 1 ounce for 2 gallons of water
- Wolfgang Uber SiO2 Rinseless Wash = 1 ounce for 2 gallons of water
- Optimum No Rinse Wash & Shine = 1 ounce for 2 gallons of water
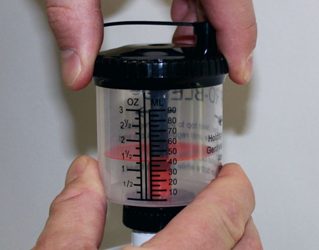 You can use a measuring cup or check out this Pro Blend Bottle Proportion which makes measuring any concentrate quick, easy and accurate. The Pro Blend Bottle Proportioner comes in two sizes.
Pro Blend Bottle Proportioner 32 ounce size
Pro Blend Bottle Proportioner 1 gallon size (128 ounces)
Simply attach the correct Pro Blend Bottle Proportioner to your bottle of concentrate and then adjust the regulator to the desired level. Next squeeze the bottle till the concentrate just fills over the top of the regulator.
Then simply remove the small plastic dust cap off the Pro Blend Bottle Proportioner and pour the concentrate into your bucket of water. After you add the rinseless wash concentrate to the water stir to create a thoroughly mixed cleaning solution.
Then add 4-5 gallons of clean water to your rinse bucket. Use this to rinse your wash mitt or sponge before reloading it with fresh cleaning solution. You can place a Grit Guard Insert, (Or 2 Grit Guard Inserts), into the bottom of your rinse water bucket to help remove dirt particles off your mitt and trap them on the bottom of the bucket.
You're ready to use a rinseless wash to wash your car!
Washing your car
1. Start at the top and work your way down
The idea behind using a rinseless wash is to wash and dry one panel at a time. If you start out washing and drying a lower panel than the roof, then when you wash the roof you'll likely have cleaning solution running down and re-wetting a dry panel, which you've already washed and dried, causing you to have to dry the panel again or possibly wash and dry the panel a second time. So start at the top and work your way down.
 |
 |
Wash one panel or section of a panel at a time
The idea behind using a rinseless wash is to wash and dry a panel or a section of a panel at one time. If you try to wash too large of an area before drying the cleaning solution can dry onto the panel.
Two factors that determine how large of a panel or section of a panel you tackle at one time:
- Size of the panel
If you have a small panel to wash, like the hood of a Mini Cooper, then it's small enough you can wash the entire panel and dry it before the cleaning solution can dry. If however you're washing a Chrysler 300, you might find it easier to break the hood up into two halves and wash and dry one half at a time.
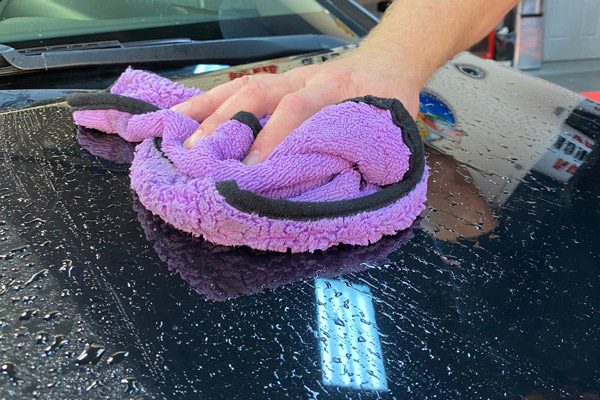
The goal is to wet the panel, loosen any dirt or road grime and then wipe or blot the panel or section dry.
Again, if a panel is too large you could risk having your cleaning solution dry before you have a chance to dry it with your towel.
- Temperature and Air Flow around the car
On warm or hot days, or in areas where there's a strong air current or wind, these two factors can cause your cleaning solution to dry faster than in lower temperatures and no-wind environments. So take this into consideration when deciding how large of a panel or section of a panel to tackle at one time. The goal is to wash and dry the paint before the cleaning solution can dry on its own.
Slicing your car up into sections.
Here's a suggestion for slicing up the car into sections when washing with a Rinseless Car Wash. I start at the top like most of you but add a twist...
- Roof
- Side Glass
- Horizontal Panels like the Hood and Trunk lid
- Vertical Panels - But only the upper portions as these tend to be cleaner than the lower portions
- Front Bumpers and Grills
- Rear Bumpers and Rear Vertical Panels like you find on SUV's, some passenger cars or for example, the tailgates on trucks.
- Lower Vertical Panels - Now do the lower portions of the vertical panels, these are the dirtiest sections.
- Lastly, the wheels & tires. You may choose to use a brush instead of a wash mitt.
Note: Air currents swirl around the rear of cars, truck and s.u.v.'s as you're driving at highway speeds and sometimes deposit an oily road film on to these rear, vertical panels.
2. Use a gentle touch and a dedicated wash mitt.
When using a rinseless car wash, the idea is to carefully move your wash mitt over the surface only enough to loosen the grip any dirt or road grime has on the paint and then stop. It's also a good idea to have a speciality wash mitt or sponge just for this purpose. The Speed Master Rinseless Wash Sponge is a large, porous wash tool that is ultra-safe to use on paint. The crosscut pattern on the sponge creates numerous cracks and "alleyways" that trap dirt and safely remove from the surface of your car. Don't let harsh weather, water restrictions, or a lack of microfiber towels stop you from having the cleanest finish you can.
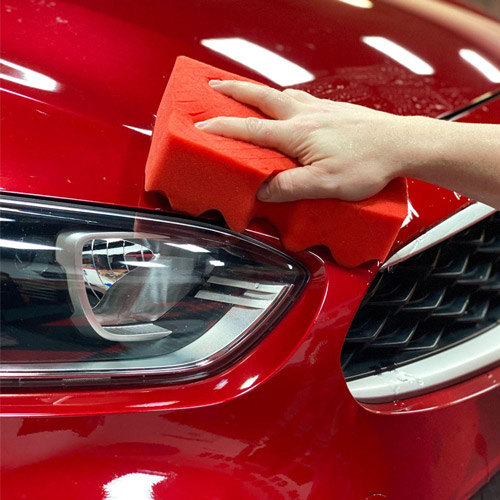 |
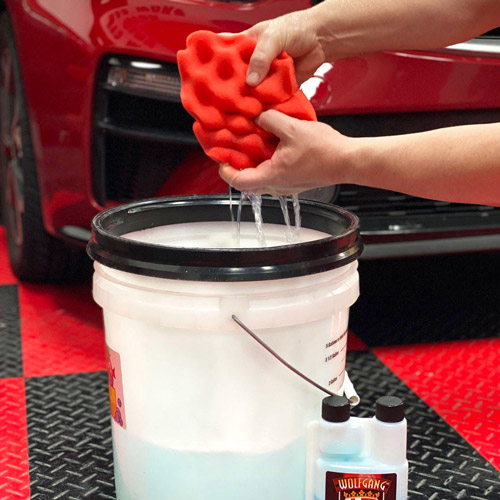 |
It's pretty common to see people washing their cars without thinking about what they're doing and pushing their wash mitt over the same section of paint dozens of strokes. In reality, one or two passes would have been sufficient. So focus on the task at hand and only make as many gentle passes as you deem necessary to loosen and dirt or road grime then STOP.
4. Dry that paint!
The first thing you want to do after washing a panel, or a section of a panel, is to wipe the panel dry. To dry a panel off you can either wipe the panel dry or blot the panel dry. Either technique can be used. The Cobra Guzzler Hybrid Twisted Drying Towel and Speed Master The Notorious D.R.Y. Towel are excellent for drying off rinseless washes.
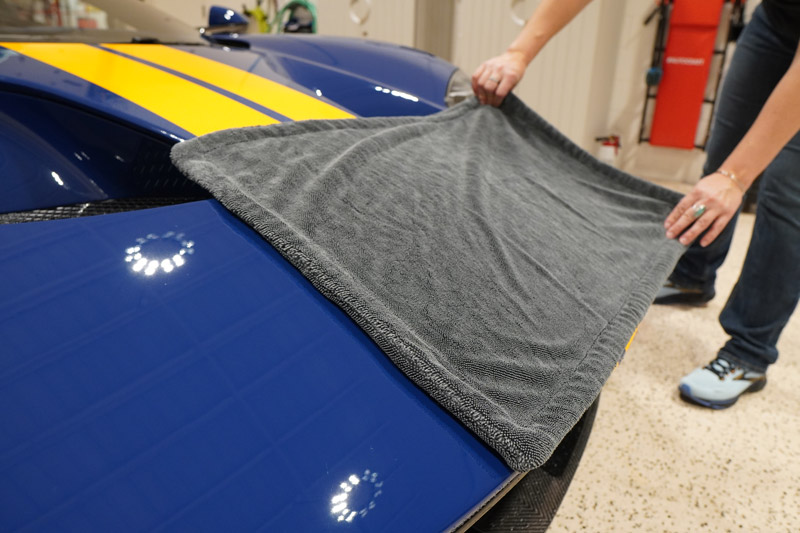
If you're working on a daily driver or getting ready to buff out the paint, then wiping is fine. If you're doing a maintenance wash on a car with an excellent finish or a car you've already buffed out, then you might consider the blotting technique with a light wipe afterwards.
5. Rinse your wash mitt and re-gather fresh cleaning solution.
After you wipe the panel dry and you're ready to wash another panel, that's when you'll clean your wash mitt or sponge by scrubbing it against the Grit Guard Insert (this acts to extract dirt particles out of your mitt or sponge), and then wring out the excess water before gathering some fresh cleaning solution.
Repeat the above process as you work your way around the car.
When washing wheels and tires using a Rinseless Wash, instead of using your high quality wash mitts and/or sponges or even brushes, maybe consider using a microfiber or cotton towel from your tatty microfiber and cotton towel collection. Preserve your fine buffing towels for the paint.
